
GraphQL is a query language for APIs and a runtime for fulfilling those queries with your existing data. GraphQL provides a complete and understandable description of the data in your API, gives clients the power to ask for exactly what they need and nothing more, makes it easier to evolve APIs over time, and enables powerful developer tools.
GraphQL is the modern way to create flexible, robust, and strictly-typed APIs.
Today we are going to create a NodeJS GraphQL-API using Apollo Server for our simple jobs GraphQL API.
Prerequisites
- What is GraphQL
- Understand what is GraphQL queries and mutations
- Understand what is Schemas and Types
- You have NodeJS (v8+), I will use NodeJS v19.1.0
Getting started
Create new project
Open your terminal and create a new folder for our future project. Run the following command and cd into the folder.
mkdir graphql-api-example
cd graphql-api-example
Now, use npm (or Yarn) to initialize a new Node.js project.
npm init --yes
Install the dependencies
For this tutorial we will need only two dependencies: graphql and pollo-server
npm install --save graphql apollo-server
It should populate the package.json and node_modules folder.
Create server.js file
All the code for our GraphQL API will go into single file server.js
touch server.js
Creating schema and query our GraphQL API
Create a schema
It’s useful to have an exact description of the JSON data we can ask from our GraphQL server - what fields can we select? What kinds of objects might they return? What fields are available on those sub-objects? That’s where the schema comes in.
GraphQL schema defines structure of our data, which we can query later. Let’s create one.
const { gql, ApolloServer} = require('apollo-server');

const typeDefs = gql`
  type Job {
    title: String
    description: String
    featured: Boolean
  }

  type Query {
    jobs: [Job]
  }
`;
The Query type is special: it lists all of the available queries that clients can execute, along with the return type for each. In this case, the jobs query returns an array of zero or more Jobs
Writing resolvers for our query
Resolvers define where the data comes from.
Apollo Server is what we call data-source agnostic — this means that you can fetch data from any source you like (SQL & NoSQL databases, REST APIs, other GraphQL APIs, or even just static JSON).
Let’s define jobs data, by adding following code in out server.js
const jobs = [
  {
    title: 'Ruby on Rails Software Engineer',
    description: 'Senior Ruby/Rails Engineer',
    featured: true
  },
  {
    title: 'NodeJS Software Engineer',
    description: 'Senior NodeJS Engineer',
    featured: false
  }
];
Now we have some data to be resolved. Let’s create a resolvers object and connect it to our jobs data.
const resolvers = {
  Query: {
    jobs: () => jobs;
  }
}
Configure instance of our GraphQL server
We have our schema, data and resolver, so let’s do the final bit of coding to instantiate our server.
Let’s write the final code at the end of our server.js file.
const server = new ApolloServer({ typeDefs, resolvers });

server.listen({ port: 3000 }).then(({ url }) => {
  console.log(`💪 Server is listening at ${url}`);
});
Running
Let’s run our server from the root of our directory with the command
node server.js
Terminal should output nice log message:
💪 Server is listening at http://localhost:3000/
Query our GraphQL API server with Apollo Explorer
The Apollo Studio Explorer is a powerful web IDE for creating, running, and managing GraphQL operations.
To use the explorer, we’ll head to studio.apollographql.com/dev and create an account (using either GitHub or your email)
Or You can open http://localhost:3000/ and click on Query your server button:
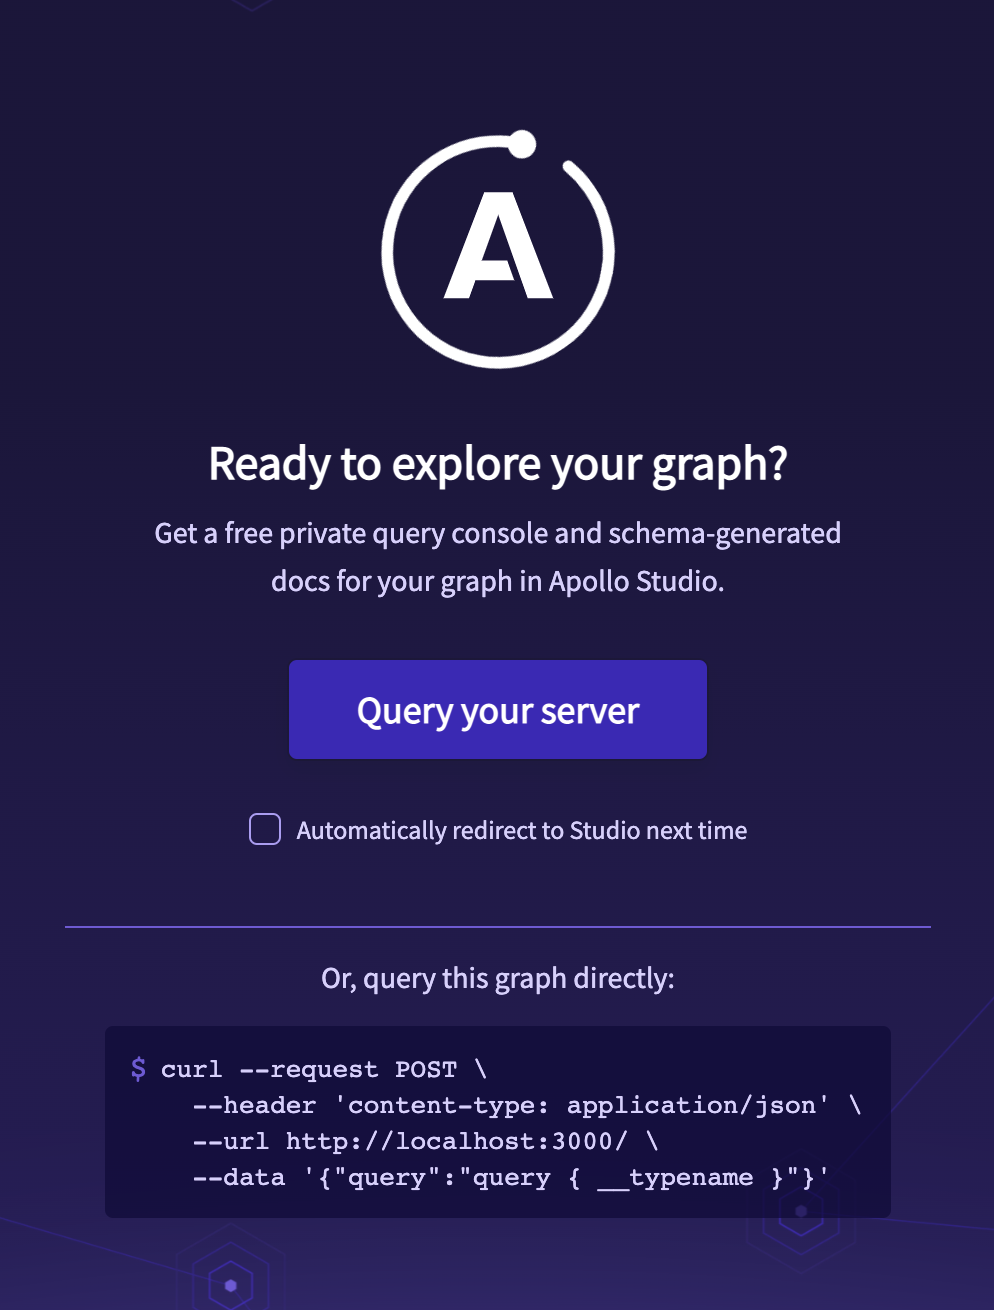
And that is it, now You can start quering your GraphQL API server.
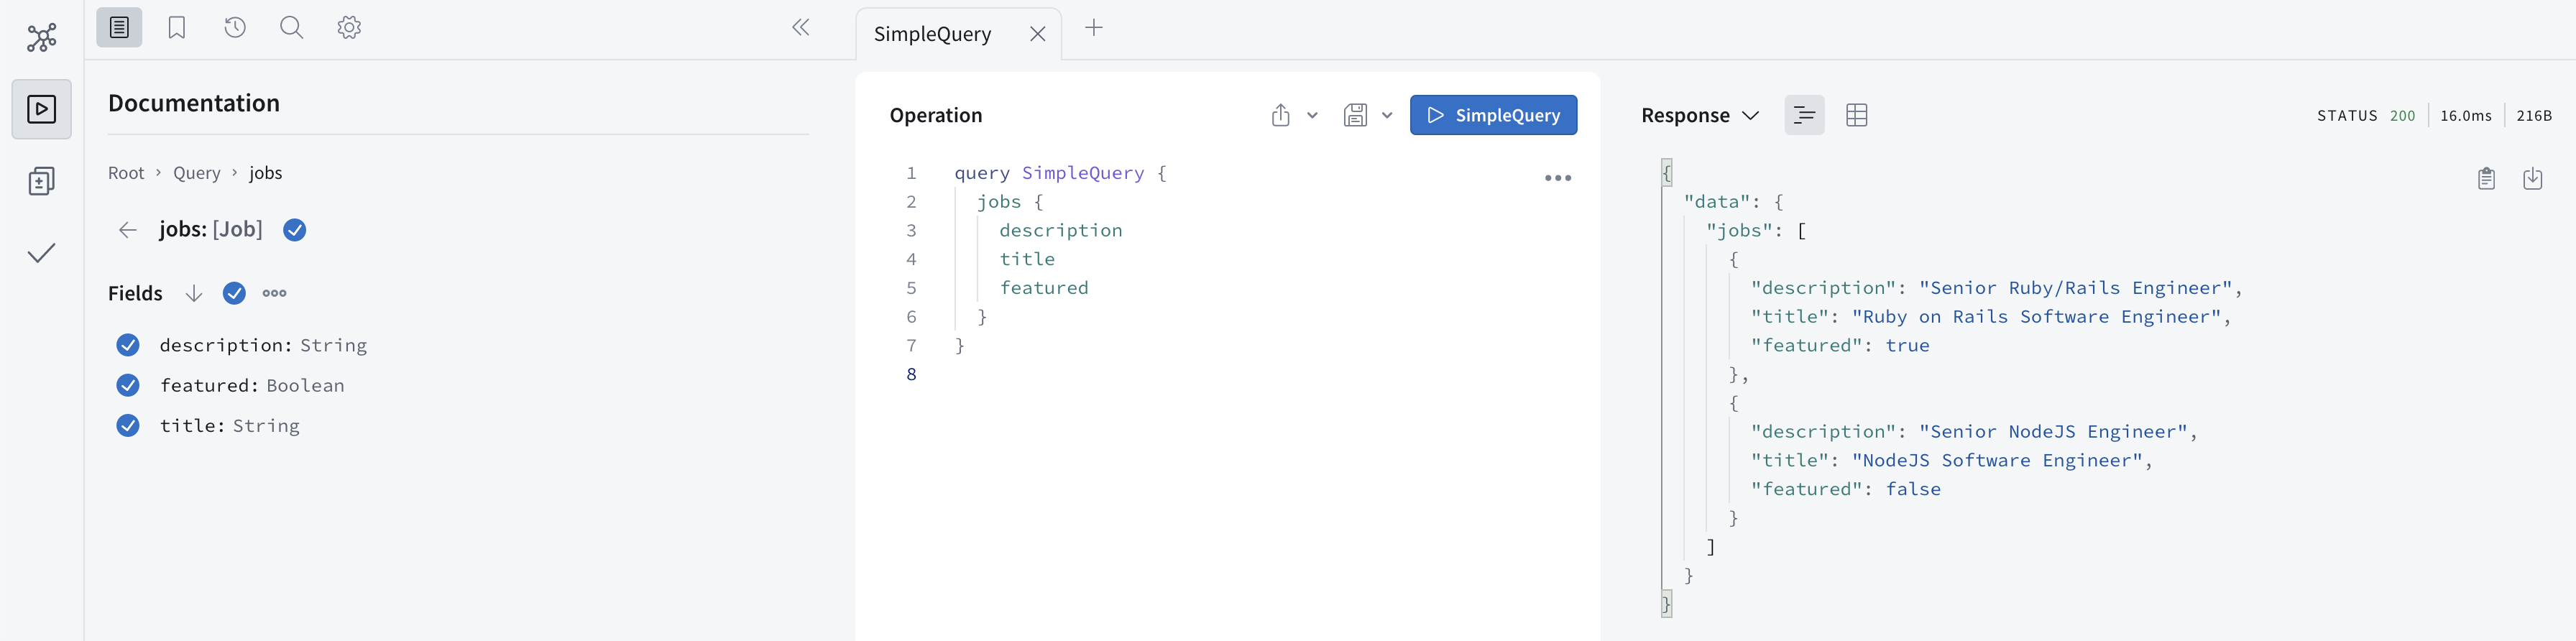
In the Operation tab, paste the following query and click the SimpleQuery button.
{
  jobs {
    title
    description
    featured
  }
}
Now You should see the response on the right.
And this is it. Congratulations 🏆 on your first GraphQL API!
What to do next?
You can go to official page for the Apollo GraphQL Tutorials here
Thank You!
